Hello everyone!
Today is a happy day on my blog and I am back with more crafty news – I am super duper excited to be joining Winnie & Walter as their Leading Lady for this month!! Eep!! I have been a big fan of Winnie & Walter’s stamps and dies for a couple of years and participated in their awesome papercraft challenges countless times. 😀 Shay is one of the most generous and kind shop owners in the industry and I feel honored that she asked me to guest design as their Leading Lady!!

I am gonna have a blog post for you guys each Saturday during February and I thought I would focus on a technique that I use super often on my cards: masking! It’s a very versatile technique that helps you get the most out of your supplies! I am gonna concentrate on a specific way to use it every week. I am also gonna share Copic guides and a few tips on coloring alongside the masking techniques. The timing couldn’t be more perfect as Kathy Racoosin’s #thedailymarker30day is taking place again during February – so I hope my coloring tips will inspire you for your coloring!
But back to today’s technique. In this first Leading Lady post I will show you two examples on how to:
USE MASKING WITH STENCILS
So let’s ‘dive’ right in, shall we? This is my first card:

Here is how I used masking to create the background on this first card with the help of two graphic stencils – Polka Creative Screenings and Triangled Creative Screenings:
- I took a strip of Post-It Tape and put it across my cardstock panel at an angle to mask off the area for my sentiment. You can also use a strip of masking paper or a piece of painter’s tape!
- First, I used light colored ink pads and a blending tool to add a minty base color above the tape and a light blue base color below the tape. This helped to define the borders of the masked area.
- After that I placed the Triangled stencil above my mask and inkblended three shades of green ink over it. I also added black watercolor splatters because I always love the artsy feel that it gives. 😊
- For the bottom part I took the Polka stencil and inkblended light grey ink over it.
Removing the tape after you’re finished is always an exciting moment! I was happy with the outcome and went on to design the rest of my card. I die cut the Wonder Cutaway once from white cardstock and once from black fun foam and glued both together for dimension. I adhered them onto the background.
In addition, I stamped “winter” and “land” from one of the sentiment stamps from Yetitide Greetings to create my “winter wonderland” sentiment. To mask off the parts of the sentiment stamp that I didn’t need I used a piece of washi tape when inking up the stamp! Just remember to remove the washi before stamping on your project (ask me how I know lol) …
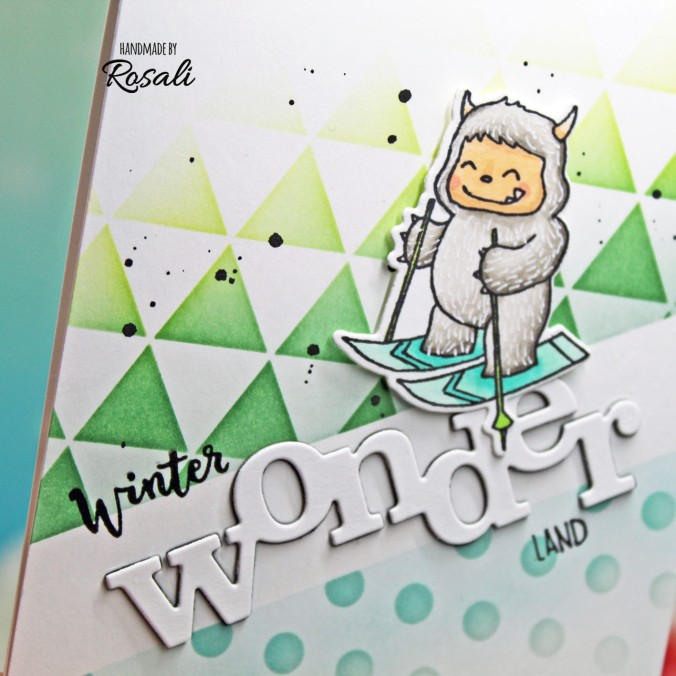
The skiing yeti from Yetitide Greetings was the perfect critter for my card. I colored him with Copics (see coloring guide below) and adhered him using foam tape. If you use your imagination it kind of looks as if the white masked strip could be a snowy hill and the green triangle pattern could be trees!
For my second card, I followed a similar idea:
I wanted to use the Triangled stencil to represent mountains on my background. To get that look, I used Post-It Tape once more – this time putting it onto the stencil instead of the cardstock. I masked off a bigger triangle on the Triangled stencil to use as a mountain and took light blue and teal Distress Oxides for inkblending over the stencil. Using this method, I added three mountains onto my grey background panel.
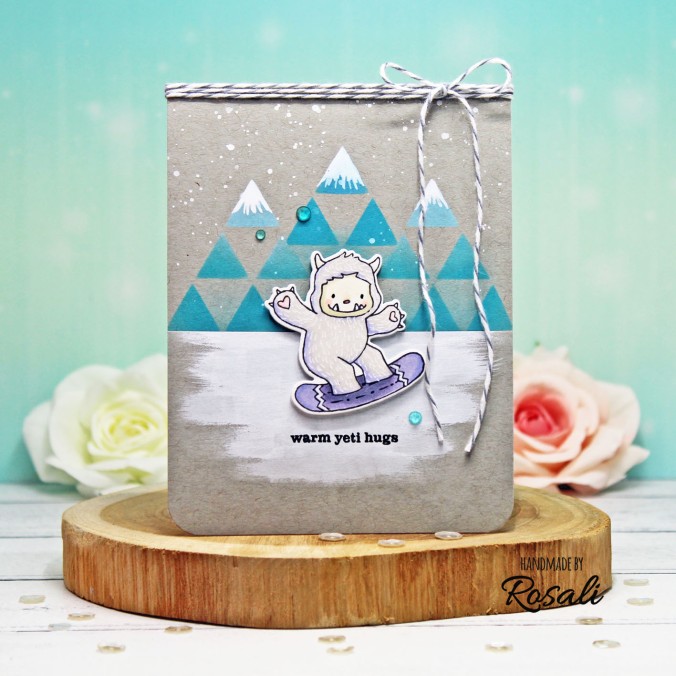
Then I took Copic Opaque White paint to
- give my mountains snowy tips,
- add small splatters as snowflakes and
- paint on a snowy ground (with a damp / rather thirsty flat brush – to get the painted look that I wanted)
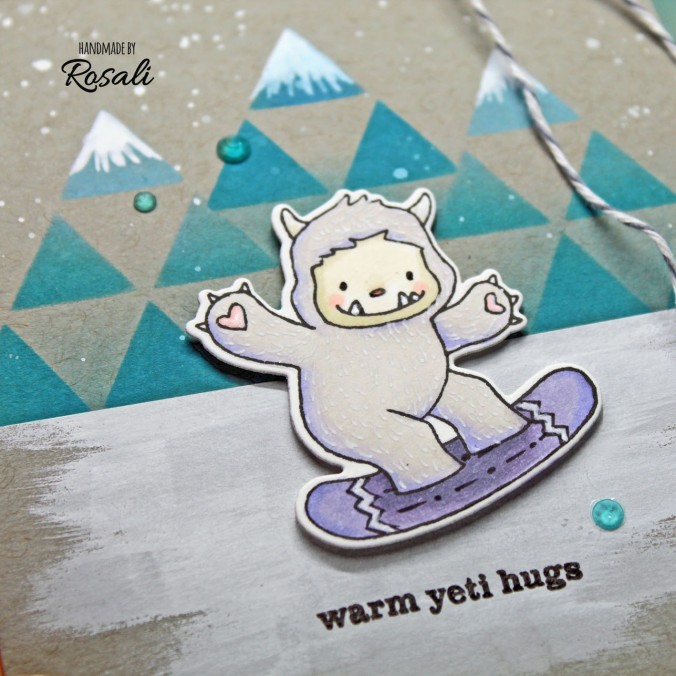
The snowboarding yeti and a small “warm yeti hugs” sentiment from Yetitide Greetings made my winter scene complete. Instead of plain grey I added a tint of lilac to my yeti this time. I really like the teal and lilac together in front of the grey card front!
CARD CLOSE-UP:
COPIC GUIDE & COLORING TIPS:
Card 1
Yeti’s face: E51, E21, R20
Yeti’s fur: 0, W1, W3, W4, W5
Skis & ski poles: G000, G00, BG13 & YG03, YG13
Card 2
Yeti’s face: YR30, E81, R20
Yeti’s fur: W1, BV02, V20, V22
Snowboard: V22, V25, V28
TIP 1: For an easy fur look, add small flicks over your Copic coloring with a white gel pen!
TIP 2: Add patterns to the skis and snowboard with a Memento Marker for some extra interest.
COMMENT TO WIN A GIFT CARD
I hope I have given you some inspiration today! Thanks for reading all the way down. 🙂 Winnie & Walter has generously sponsored a 30 $ gift certificate for one of you to win! All you have to do is leave me a comment under this blog post. I’d love to hear what you think about my cards. Have you tried masking with stencils yourself?
I will pick a random winner from all four blog posts by the end of February 24th.
If you haven’t already make sure to check out Winnie & Walter’s blog for my post, too. Thank you in advance and happy weekend! ♥
Rosali
If you like this post, be sure to follow my blog via email or Bloglovin’ (buttons are in the sidebar on the right / down below if you’re on a mobile device). ♥
Entry for these challenges:
https://friendship-challenge.blogspot.com/2019/02/challenge-38-alles-geht-mit.html
USED SUPPLIES:
Winnie & Walter stamps, dies and stencils:
Yetitide Greetings with Evelin T Designs Stamp Set
Yetitide Greetings with Evelin T Designs Cutaways
In a Word: Wonder Cutaway
Scenery: Pennsylvania Polka Creative Screenings
Scenery: Triangled Creative Screenings
Ink Pads:
Ranger / Tim Holtz – Distress Inks (Twisted Citron, Tumbled Glass, Weathered Wood)
Lawn Fawn – Dye Inks (Noble Fir, Minty Fresh, Merman)
Ranger / Tim Holtz – Distress Oxide Inks (Tumbled Glass, Broken China, Peacock Feathers)
Versafine Clair – Nocturne Black Ink
Paper:
Neenah Solar White (Classic Crest) – 110 lb and 80 lb
Masking Paper (Repositionable Labels)
Post-It Tape
Strathmore – Toned Gray Sketch Paper
Other Supplies:
Copic Markers
Memento – Tuxedo Black Pen
Uni-ball – White Gel Pen
Copic – Opaque White Paint
Black Watercolor
Scotch 3M – Foam Tape
Black Fun Foam
Grey Baker’s Twine
Corner Rounder Punch
Teal Rhinestone

Your cards are amazing… wonderful background
Thanks for joining us at Friendship
Hugs Anja
LikeLiked by 1 person
Vielen lieben dank, Anja! 🙂
LikeLike
loving these adorable yeti cards – thanks for sharing:)
LikeLiked by 1 person
Adorable cards! I can see why you were chosen as a guest designer!
LikeLike
Love the idea of masking with stencils, great way to get a different look every time you use a stencil, love the cards.
LikeLiked by 1 person
These cards are so fun and beautiful. I love the first one where you have the yeti skiing down the sentiment. Such a fun design. Hugz
LikeLiked by 1 person